WhatsApp Cloud API allows sending or receiving WhatsApp messages programmatically. It is basically the Cloud version of WhatsApp Business API and is hosted by Meta.
With WhatsApp Cloud API coming into the picture, business users no longer have to pay the cost of hosting the Business API on their servers and also don't have to rely on third-party applications for their on-premise API cost. Developers can now focus more on WhatsApp SaaS product features instead of managing the infrastructure for WhatsApp Business API.
In order to set up the WhatsApp Cloud API, please follow the steps below :
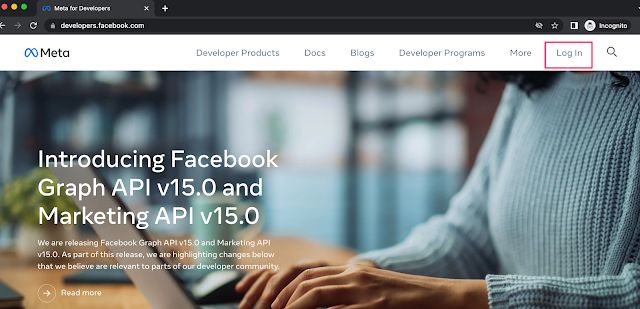
1. Navigate to the Meta Developer Page, and click on the Log in button.
2. Provide your Facebook credentials and click on Log in.

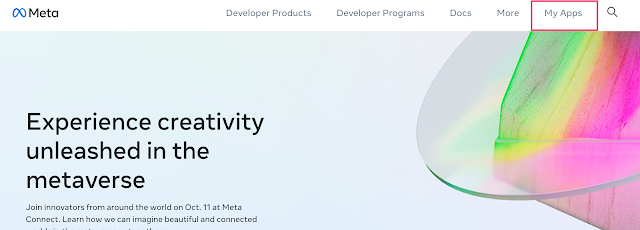
3. Once login is successful, My Apps button will show up on the page, click on it.
4. Click on the Create App button.

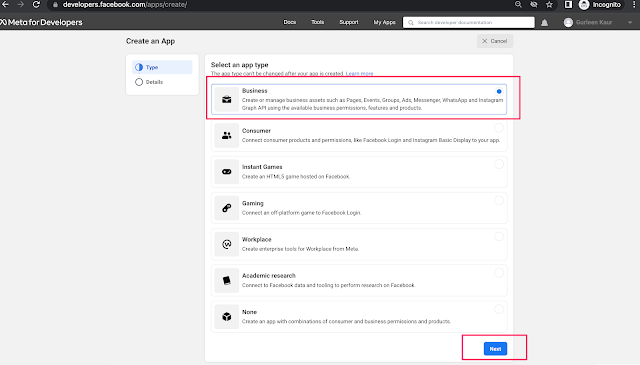
5. Select the app type as Business and click on Next.
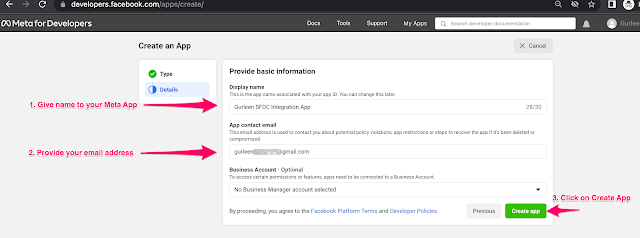
6. Provide your App details - Display Name and App contact email, and then click on Create app.
7. You'll be prompted to provide your Facebook password. Re-enter your Facebook password and then click on Submit.

8. Upon the successful creation of your app, you'll see your App name (which you provided in step 6) and App ID showing up on the screen.
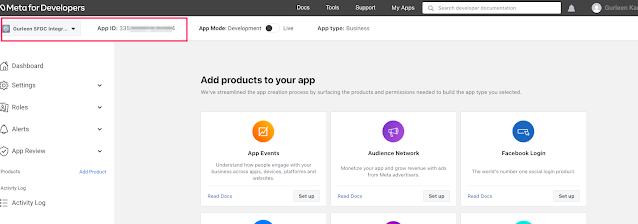
You have now successfully created your first Meta App.
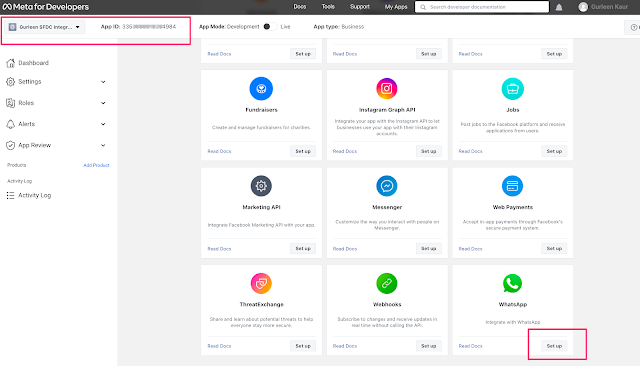
Now is the time to add Products to your App. In order to do so, scroll down to the bottom of your app screen, look for the WhatsApp product, and click on Setup.
9. You will be redirected to the WhatsApp Getting Started page.
We will choose the “Create a business account option”. Click on the Continue button to proceed.

10. You'll receive the Temporary access token, then add in the Sender's Test phone number, the Recipient's phone number, and the sample CURL request.
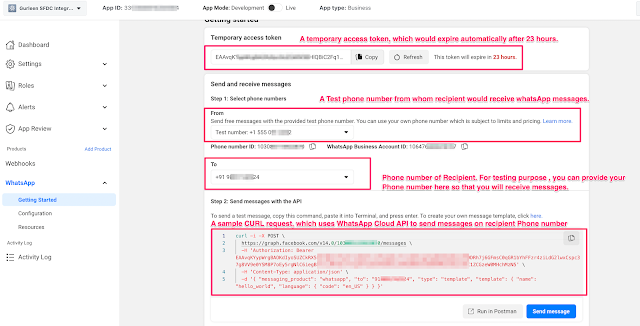
11. Let's verify, if Recipient can receive WhatsApp messages using the above sample CURL request.
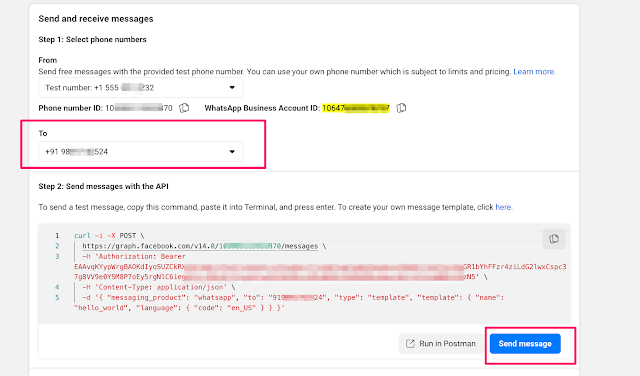
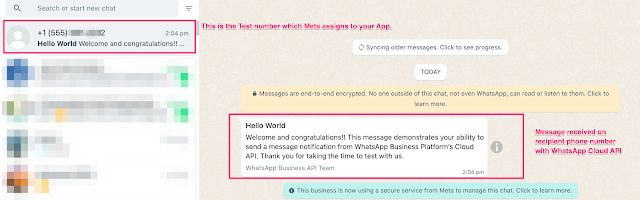
Provide your phone number in To field as the recipient. Then Send Message button would be enabled. Click on the Send Message button. Now, it's time to check your WhatsApp. You would have received a message from your App Test number.
You've successfully validated your app and sent WhatsApp Notifications to the recipient's phone using our very own WhatsApp Cloud API.
As you've seen after we registered for our Meta app, we got some very useful key integration parameters, one such parameter is Access Token (refer to Step 10 above). But the problem is that the Access Token is temporary, meaning after every 23 hours we need to generate a new access token each time, which definitely is a very tedious job to do! In order to overcome this limitation, we have another way to generate a Permanent access token for your app.
Follow the steps below to generate a permanent access token for your Meta app.
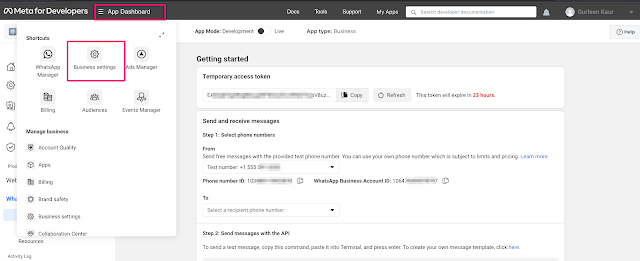
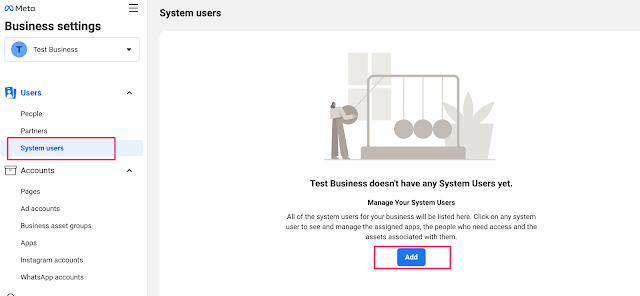
1. Navigate to the Business Settings page, click on App Dashboard > select Business Settings.
2. Then select System users under the Users category, and then click on the Add button.
3. Accept the Terms and Conditions, if it appears on the screen, and then click on Done.
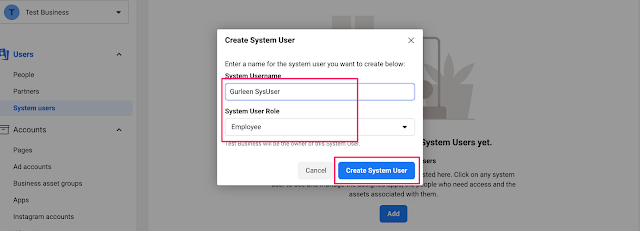
4. A popup will open, enter the System Username, select the System User Role, and then click on Create System User.
5. If prompted, accept the Terms and Conditions and click on Done.
6. You'll see that the System users you created will now appear on the screen.
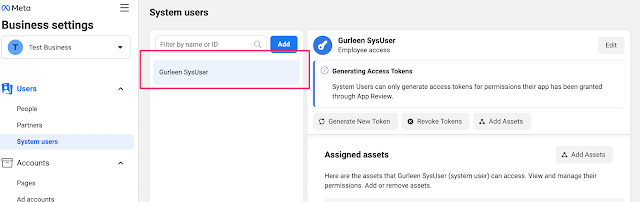
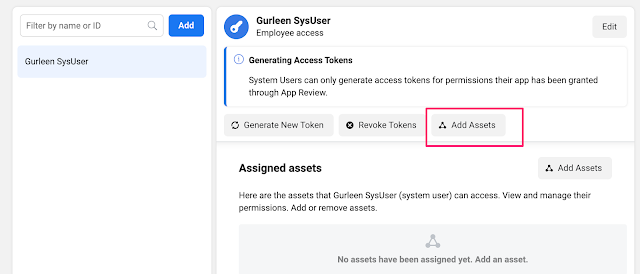
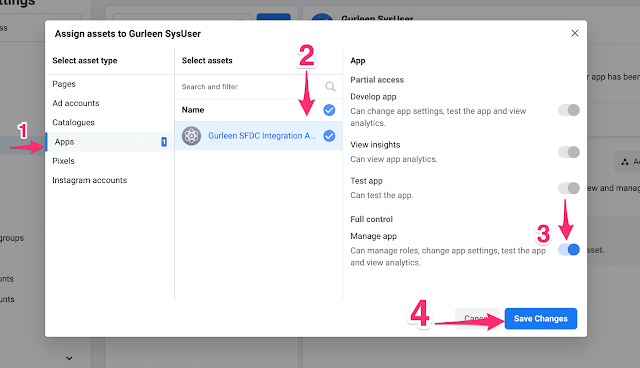
7. Click on Add Assets.
8. In the popup - Go to Apps > select the app that we created > turn on the toggle under Manage app > Save Changes.
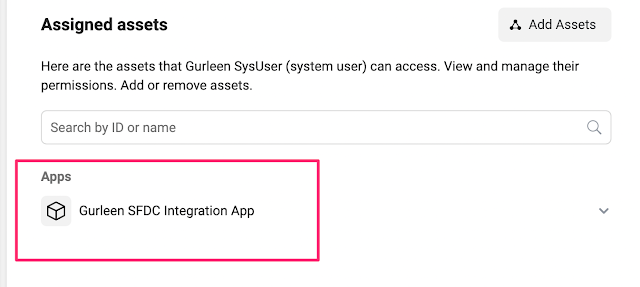
9. You should see the app added in Assigned assets.
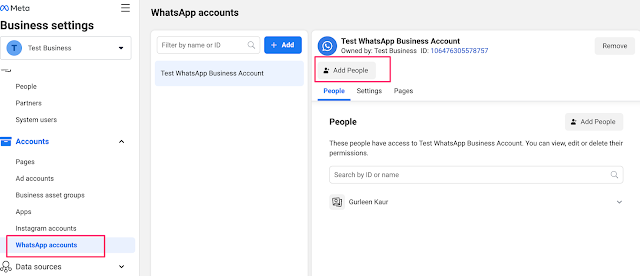
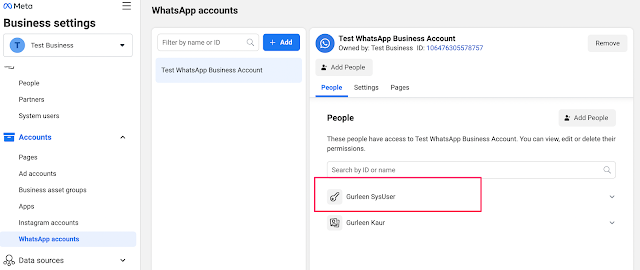
10. From the left sidebar, select WhatsApp accounts > Add People.
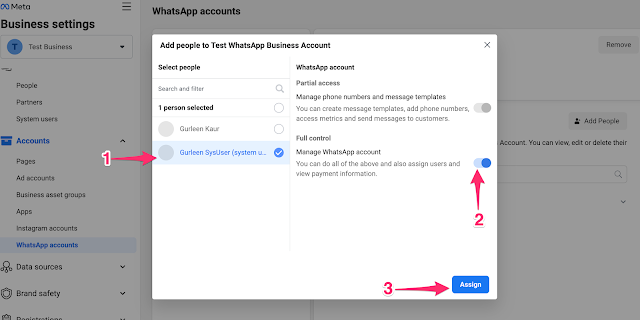
11. In the popup, select the system user that you created (at step 4) > turn on the toggle for Manage Whatsapp account, click Assign, and then click Done.
12. You should see your system user or people added.
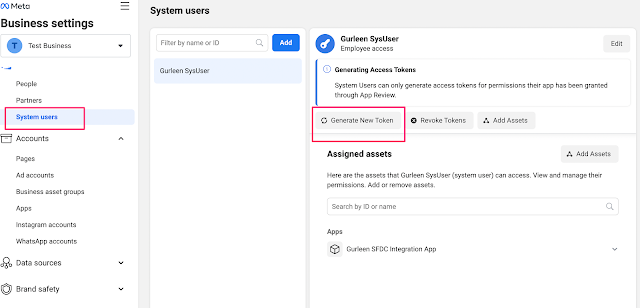
13. Go back to the System users page and click on Generate New Token.
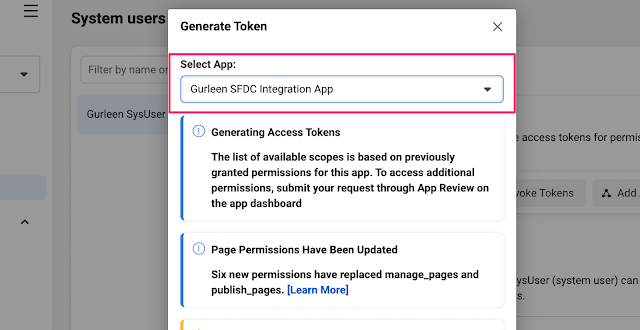
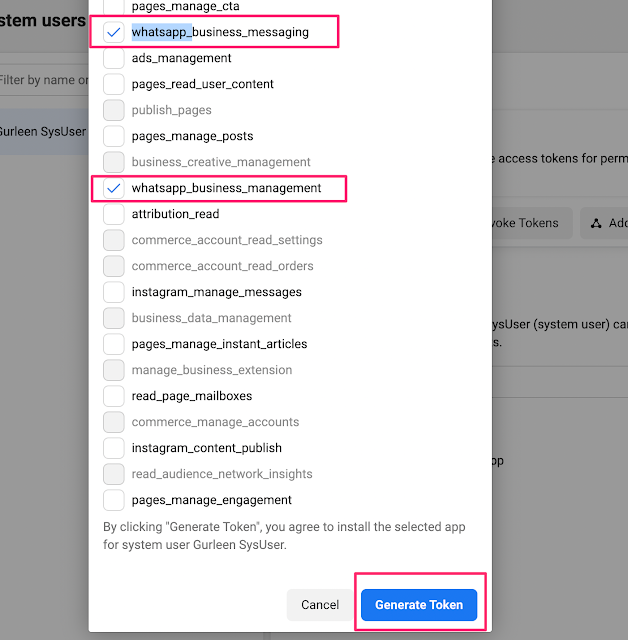
14. In the popup, use the dropdown Select App, set the below configurations, and then hit Generate Token.
15. Finally, we received our permanent Access token.
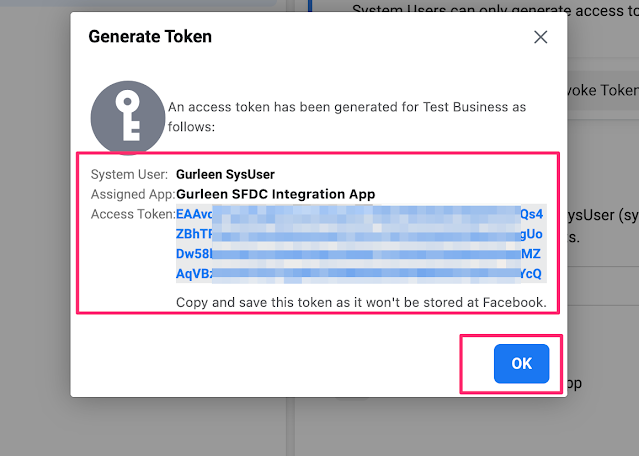
16. Copy the access token somewhere. Also, you can store your access token in Salesforce as well and can refer to the same while making API calls.
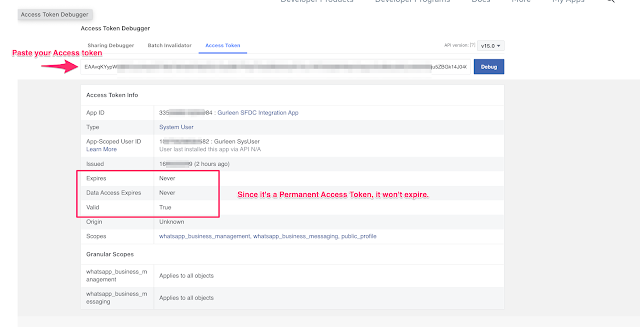
You can validate your access token by clicking on Access Token Debugger:
In Part 2, we will see how we can make a callout to WhatsApp cloud API from Salesforce using the above configurations and send notifications to Contact when the Case status changes.